Send a scanned document to a network folder
The product can scan a file and save it in a folder on the network. The following operating systems
support this feature:
●
Windows Server 2003, 64-bit
●
Windows Server 2008, 64-bit
●
Windows XP, 64-bit
●
Windows Vista, 64-bit
●
Windows 7, 64-bit
●
Novell v5.1 and later (access to the
Quick Sets
folders only)
NOTE:
You can use this feature with Mac OS X v10.6 and earlier if you have configured Windows
File Sharing.
NOTE:
You might be required to sign in to the product to use this feature.
The system administrator can use the HP Embedded Web Server to configure pre-defined
Quick Sets
folders, or you can provide the path to another network folder.
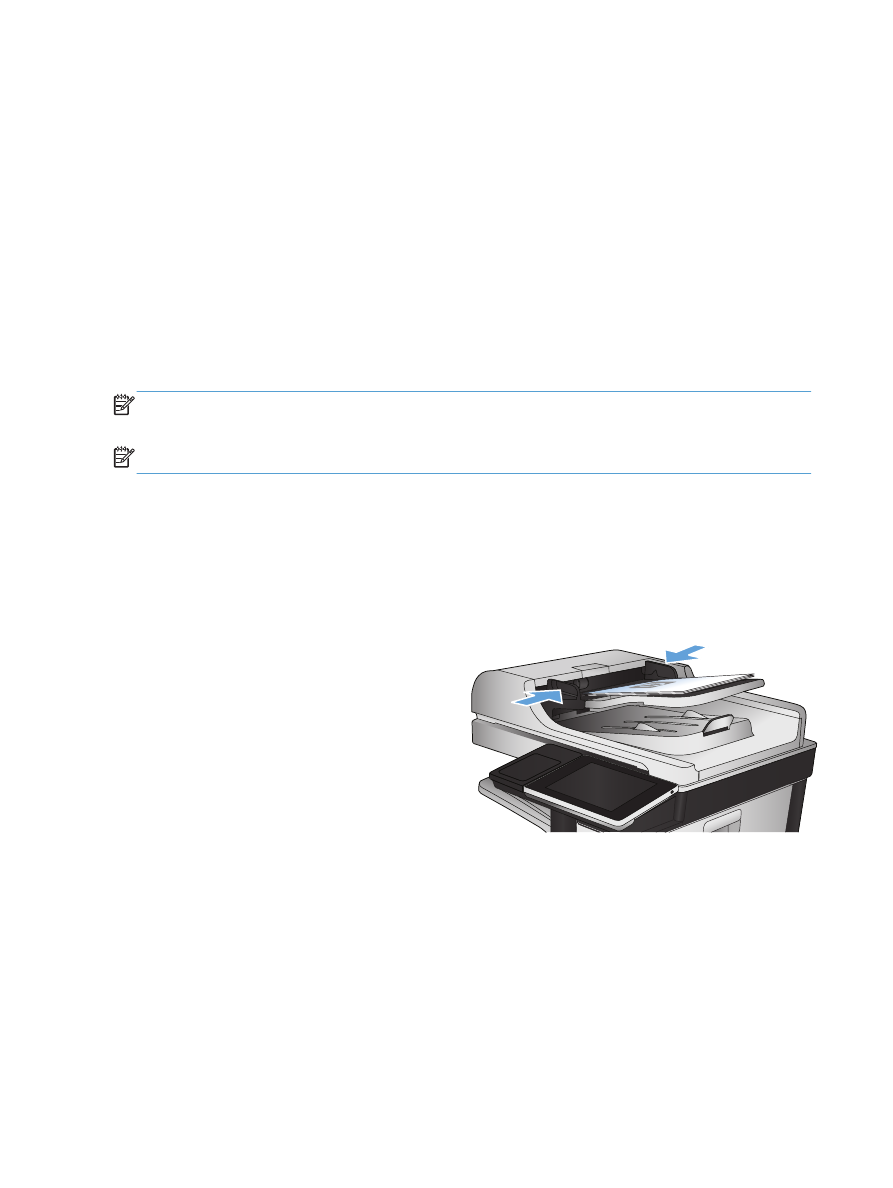
1.
Place the document face-down on the scanner
glass, or place it face-up in the document
feeder and adjust the paper guides to fit the
size of the document.
160
Chapter 7 Scan/send
ENWW

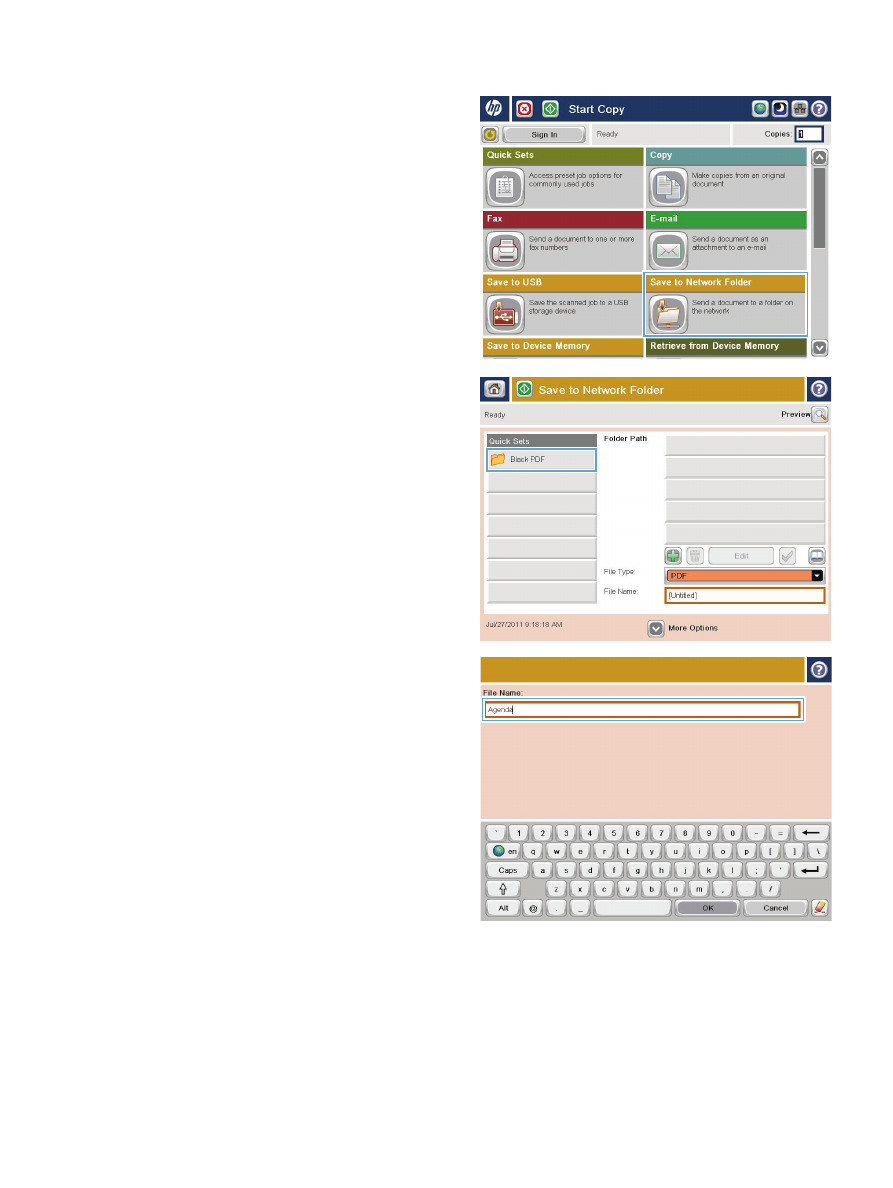
2.
From the Home screen on the product control
panel, touch the
Save to Network Folder
button.
NOTE:
If prompted, type your user name
and password.
3.
To use one of the preset job settings, select one
of the items in the
Quick Sets
list.
4.
To set up a new job, touch the
File Name:
text
field to open a keyboard, and then type the
name for the file. Touch the
OK
button.
ENWW
Send a scanned document to a network folder
161

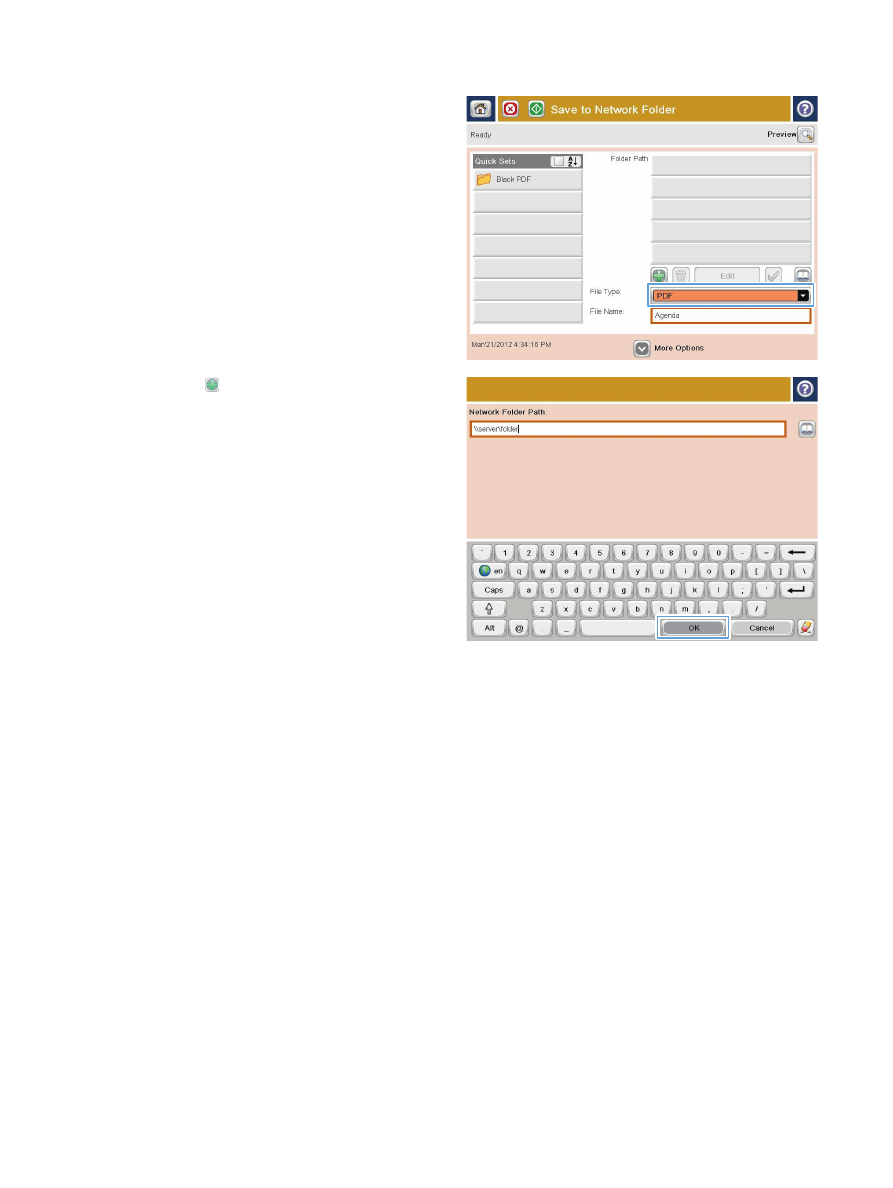
5.
If necessary, touch the
File Type
drop-down
menu to select a different output file format.
6.
Touch the Add button that is below the
Folder Path
field to open a keyboard, and then
type the path to the network folder. Use this
format for the path:
\\path\path
Touch the
OK
button.
162
Chapter 7 Scan/send
ENWW

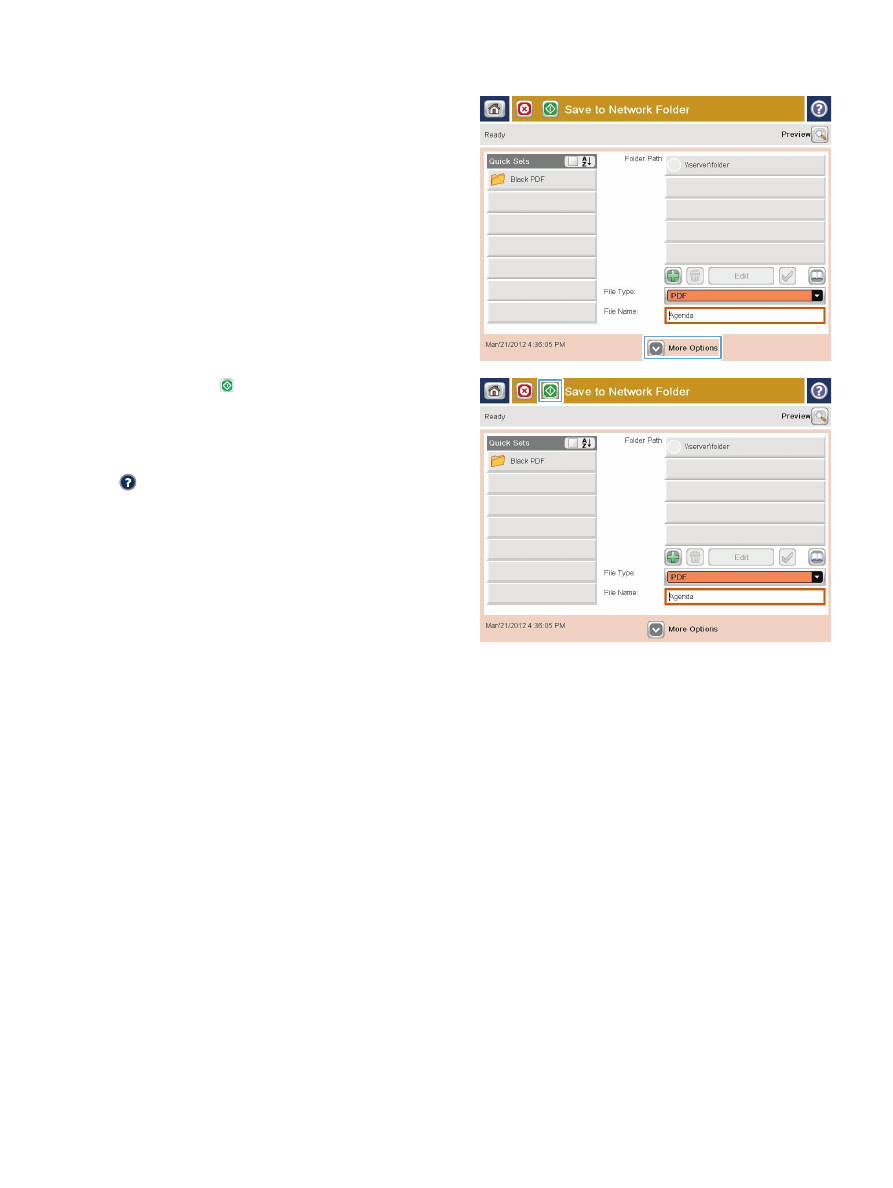
7.
To configure settings for the document, touch
the
More Options
button.
8.
Touch the Start button to save the file.
NOTE:
You can preview the image at any
time by touching the
Preview
button in the
upper-right corner of the screen. For more
information about this feature, touch the Help
button on the preview screen.
ENWW
Send a scanned document to a network folder
163